

Configuring Shopping Ads campaigns
Note: This article assumes you already have a Google Ads connection in Channable. If you still need to create a connection with your Google Ads account you can take a look at this article.
Send your products to Google Merchant Center
When you want to set up a Google Shopping campaign, it is necessary to send your product information to Google Merchant Center. Google Merchant Center is the online portal used to send your items to Google Shopping. There are two ways to send your product information to Google Merchant center from Channable: in this article both options are explained. Once you've sent your product information to Google Merchant Center, you can create Google Shopping campaigns via our Shopping Ads API.
Creating a new Shopping Ads generator
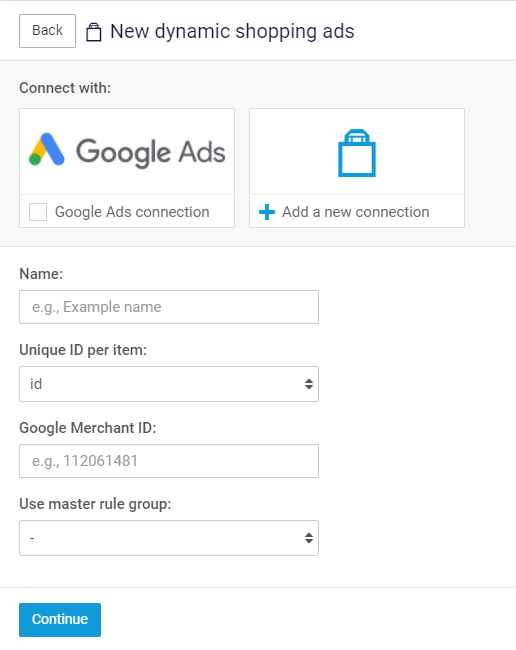
To get started with your new Shopping Ads campaign, click on the shopping ads tab on the left-hand side menu. Then click the "+ Add dynamic shopping ads generator" button. This opens a new screen in which you have to choose:
Connect with: The Google Ads connection to which you want to send your Shopping Ads campaign.
Name: A name for your Shopping Ads campaign (this is not going to be the name of your Shopping Ads campaign in Google Ads, it's just the name in the Channable interface).
Unique ID per item: A unique ID per product (choose the field that is connected to the ID field in your Google Shopping feed).
Google Merchant ID: The Google Merchant ID in which your Google Shopping feed is imported.
Use master rule group (optional): Choose a master rule group. You can use master rule groups for example to filter certain items from your feed or to set standard values. You can find more information about master rule groups in this article.
After filling in the generator settings, click on continue. You now get to the next step: 'Rules', but first we recommend you to configure your Google Ads status & Sync status.
Configure Google Ads status & Sync status
After creating a new generator you can configure different statuses in the 'Settings' step of the generator. Click on Settings and you will see the saved settings you just set up and the following settings:
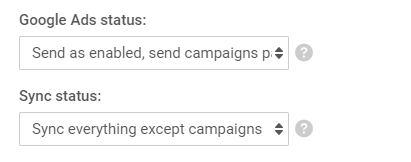
There are two different statuses in Google Ads: active and paused. Every campaign, ad group, ad, (negative) keyword, etc. can be active or paused. It is important to give some attention to these settings; please read this article for an explanation of each possible setting.
Setting up rules
After creating a generator and setting up the Google Ads & Sync status settings, it is time to set up rules. In order for the Shopping ads to work as effectively as possible, copy the rules of your Google Shopping feed to the Shopping ad. After doing that, you can add extra rules for filtering out products.
Creating a new Shopping Ads campaign
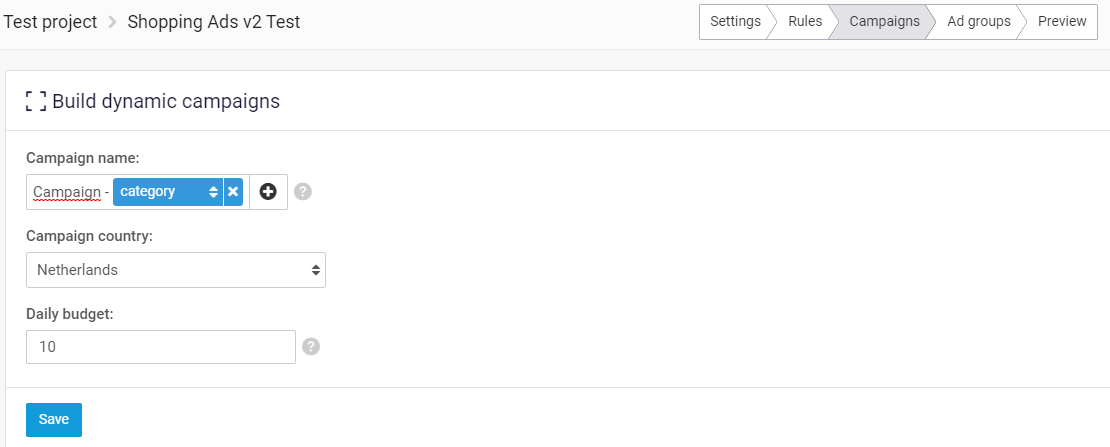
Under the campaigns step you set up the basic settings for the campaign. You need to fill in the following settings:
Campaign name
This can be set with a static value or can be filled in with a dynamic field from your import. When using a dynamic field it allows you to generate multiple Shopping campaigns on Google with the same generator.
Channable will connect to already existing campaigns that have the same title in both Channable and Google. For example, if you have a campaign template with "[brand] shoes" where [brand] is a dynamic field, Channable may generate campaigns entitled Adidas shoes and Nike shoes. If you already had a campaign named Nike shoes on Google, then Channable will connect to Nike shoes. Channable will then additionally create a new campaign entitled Adidas shoes since that one did not exist previously.
With these settings a new Google Shopping Campaign will be added in Google Ads. Do not delete this campaign in Google Ads as this will lead to issues.
To finish up the whole Google Shopping Campaign you need to create Ad groups — follow this article to build up your dynamic Ad groups.
Last updated
Was this helpful?